PythonPart
A PythonPart as an element in the DF can be understood as a container, encapsulating AllplanElements such as:
- 3D elements like: 3D-lines, surfaces, solids
- 2D elements: 2D-lines, 2D-polylines
The key feature of a PythonPart is that it can be modified parametrically.
PythonPart has properties as any other Allplan element, like Common properties or Attributes. In addition, you can introduce a hierarchy to organize your elements inside the PythonPart.
Data structure
Info
In this paragraph we will explain the background of a PythonPart. This knowledge might be helpful to, but is not required to work with PythonParts. If you want, you can jump directly to this paragraph to learn how to create a PythonPart.
The data structure behind a PythonPart is similar to the one behind a smart object (aka macro), which means it is composed of following objects:
-
The PythonPart placement (represented by the MacroPlacementElement class):
- Places exactly one definition
- Places means transforms the definition from its local into the global coordinate system using placement matrix
-
The PythonPart definition (represented by the MacroElement class):
- has one or more views (aka slides or foils) with different LOD
- is being placed in the model by one or more placements
-
The Views (represented by View class):
- encapsulates one or more model elements (3d objects, 2d lines, circles, etc...)
- belongs to exactly one definition
The diagram below shows the relationships described above:
erDiagram
PyP-PLACEMENT }|--|| PyP-DEFINITION: places
PyP-DEFINITION ||--|{ PyP-VIEW  : has
PyP-VIEW ||--|{ MODEL-ELEMENT-3D : encapsulates
PyP-VIEW ||--|{ MODEL-ELEMENT-2D : encapsulates

PyP-PLACEMENT ["PythonPart placement"] {
    str Name
    Matrix3D PlacementMatrix
    Attributes Attributes
    CommonProperties CommonProperties
}

PyP-DEFINITION["PythonPart definition"] {
    str Name
    str Hash
}

PyP-VIEW["View"] {
    bool visibility2d
    bool visibility3d
    float start_scale
    float end_scale
}

MODEL-ELEMENT-3D["Model element 3D"] {
    Any Geometry
    CommonProperties CommonProperties
}

MODEL-ELEMENT-2D["Model element 2D"] {
    Any Geometry
    CommonProperties CommonProperties
}
Note
Note that the 2D and 3D elements technically have attributes, but because they are encapsulated inside the PythonPart view, these attributes cannot be accessed by Allplan reports and legends. Hence, relevant are only the attributes of the _placement_1
Create PythonPart
The easiest way to create a PythonPart is to use the PythonPartUtil class. It will take care of tasks necessary for a PythonPart, such as:
- creating the appropriate data structure with MacroPlacementElement and MacroElement
- calculating the unique hash
- appending all the attribute parameter defined in the property palette
Example
Let's assume, that the variable cube is a ModelElement3D
representing a cube. Here is, how we create a very simple PythonPart:
from PythonPartUtil import PythonPartUtil
...
python_part_util = PythonPartUtil(common_prop) #(1)!
python_part_util.add_pythonpart_view_2d3d(cube) #(2)!
python_part = python_part_util.create_pythonpart(build_ele) #(3)!
- At this stage we can control the Common properties of the PythonPart placement. This argument is optional. If not provided, currently common properties settings will be applied
- This will add the cube to a view, that is displayed in all scales and in both ground and isometric view. We could also provide a ModelEleList
-
The BuildingElement object containing all the parameters and their values is necessary for the creation of the PythonPart. This ensures, that e.g.
- a unique hash to distinguish identical PythonParts is generated
- all the attribute parameter defined in the palette are appended to the pythonpart
The python_part is now a list containing both the placement and the definition.
You can pass this list directly to the CreateElementResult class,
like:
Views
A PythonPart is capable of having multiple views (aka foils or slides). Each of these slides can contain different geometry and can be shown/hidden based on:
- the art of the view: ground view or isometric view
- currently set scale: a more detailed representation can be shown in lower scale
A typical use-case for it is to display the PythonPart in a more detailed way in lower scales (e.g. 1:10) and in a more simplified ways in higher scales (e.g. 1:100).
These settings are stored in a PythonPartViewData object. Apply them on a view by passing the object as an optional argument to the add_pythonpart_view method.
Example
To display your PythonPart as a:
- sphere, when the scale ranges from 1:1 to 1:50
- cube, when the scale ranges from 1:50 to 1:9999
Create the utility as usual:
And append the two views to the PythonPart using the utility. First one for the scale ranging from 1:1 to 1:50:
sphere_view_data = PythonPartViewData()

sphere_view_data.start_scale = 0
sphere_view_data.end_scale   = 50 #(1)!

python_part_util.add_pythonpart_view_2d3d(elements  = sphere_model_ele, #(3)!
                                          view_data = sphere_view_data) #(2)!
- With this setting, the view will be displayed, when the set scale is lower than or equal to 50!
- Here is, where we apply the view settings. this argument is optional and if not provided, the default settings defines in PythonPartViewData will be used
- The
sphere_model_eleis the model element list containing the sphere
Now the second one with the cube, for tha scale ranging from 1:50 to 1:9999:
cube_view_data = PythonPartViewData()

cube_view_data.start_scale = 50
cube_view_data.end_scale   = 9999

python_part_util.add_pythonpart_view_2d3d(elements  = cube_model_ele, #(1)!
                                          view_data = cube_view_data)
- The
cube_model_eleis the model element list containing the cube
Finally, create the PythonPart:
The visibility of the views can also be determined by the art of the view. Sometimes it is useful to display the PythonPart in the ground view with simplified 2D view consisting of lines, and use complex 3D solids only in the isometric view.
To achieve this, use the appropriate method of the PythonPartUtil to create the view:
| Function to use | Behavior |
|---|---|
| add_pythonpart_view_2d | the view is visible in the ground view only |
| add_pythonpart_view_3d | the view is visible in the isometric view only |
| add_pythonpart_view_2d3d | the view is always visible |
Note
Note, that the usage of the above mentioned methods makes it irrelevant, what is set in the properties visible_in_2d or visible_in_3d of the PythonPartViewData.
Failure
The following settings of the PythonPartViewData have at the moment no influence on the visibility behavior of the created PythonPart:
Example on GitHub
The functionalities mentioned above are shown in the example ViewSettings ( PYP | PY).
Attributes
Here's how you can save a value calculated inside the script (width) in a PythonPart's attribute
(let's use the attribute @221@). First, construct a
BuildingElementAttributeList
Append the attribute @221@ together with the value to the list. Feel free to append as many attributes as you need:
Assign the attributes on the PythonPart using the add_attribute_list method of the utility.
Example on GitHub
Have a look at the example PythonPartWithAttributes ( PYP | PY). When the check box Append geometry attributes is checked, the geometrical parameters (length, width, height) are appended to the PythonPart as attributes.
Tip
When creating a PythonPart using PythonPartUtil, all the parameters with an attribute defined in the .pyp file are automatically appended to the PythonPart as attributes. You don't need to append them extra.
If you use a parameter with an attribute for the geometry calculation you will achieve following behavior: modifying the attribute linked to this parameter outside the PythonPart modification mode (e.g. with Allplan's native function Modify attributes) will influence the geometry of the PythonPart the next time the PythonPart is activated. It's because the new attribute value is read back by the framework before your script is executed. This links the attribute value and the geometry of the PythonPart together.
Example on GitHub
Have a look at the example PythonPartWithAttributes ( PYP | PY).
There is a parameter layer thickness. This parameter is linked to an attribute called LayerThickness. Place the PythonPart in the model and then modify the value of this attribute using ALLPLAN native function Modify attributes. Then reactivate the PythonPart again. You will see, that the thickness of the bottom part of the PythonPart changes accordingly.
Placement
To control, how the PythonPart is placed in the model, the method create_pythonpart offers two optional arguments:
placement_matrixlocal_placement_matrix
These arguments require a Matrix3D describing rotation and/or translation (see this article to learn how to construct it) to place the whole PythonPart container in the desired position and orientation in the model.
pyp_util = PythonPartUtil()
...
python_part = pyp_util.create_pythonpart(build_ele,
                                         placement_matrix = placement_mat)
Info
You can construct one matrix and pass it to one of the arguments (as shown above) or two matrices (e.g. one with rotation and second one with translation) and pass them to both arguments separately. Keep following in mind:
- order: the transformation described in
placement_matrixis applied at first, followed by thelocal_placement_matrix - the
local_placement_matrixis saved in the attribute @1035@,placement_matrixis not saved in any attribute
Tip
Use this feature to rotate or move the entire PythonPart container rather than rotating/moving the individual elements inside the container. This will ensure the right behavior of the created PythonPart.
Example on GitHub
A typical use-case for this feature is, when you want to give the user control over the orientation of the PythonPart, when placing it. In this case, you rotate the whole PythonPart. It is shown in the example IdenticalRotatedPlate ( PYP | PY), where the user can rotate the PythonPart around all three XYZ axes.
Hierarchy
Your PythonPart can be complex and consist of many individual elements. If you want these elements to have their own attributes and enable the user to perform a quantity take-off on them (e.g. with Allplan reports or legends), you need to introduce a hierarchy.
There are three ways, how you can do it. As usual, there is no one perfect solution for all problems. Choose the one that best suits you. Here is the overview:
Structured PythonPart is a PythonPart with multiple so called element nodes - entities with geometrical representation and attributes, which can be organized in a multi-level hierarchy.
Pros
- Complex hierarchy possible: PythonPart is the parent, element nodes are children which can have another element nodes as children.
- Each element node can have its own attributes and is evaluable with Allplan reports and legends.
- The user can manually add attributes to the element nodes using Allplan UI.
- Element nodes preserve the attributes manually added to them when reactivating the PythonPart.
- The hierarchy structure can vary depending on the scale (possible to introduce multiple LODs).
Cons
- Work-in-progress feature - some workflows or features may not work as expected.
- Incorrect representation in the IFC: all the elements in the container are represented with one IFC entity.
- Cannot be unlinked to individual elements - the result will always be a single smart symbol.
- Element nodes encapsulate the elements inside them the same way a smart symbol does.
- Element nodes must have a geometrical representation.
Learn more below
PythonPart can have elements of certain type (e.g. reinforcement) linked to it as child elements.
Pros
- Child elements are not encapsulated - manual changes to them are possible using Allplan UI
- Simple hierarchy: PythonPart is the parent, connected elements are the children.
Cons
- No representation of the hierarchy in IFC - PythonPart and its children are individual IFC entities.
- Any manual changes done to the child elements are lost after reactivating the PythonPart.
- Possible to link only certain element types.
Learn more below
PythonPart group is a simple container with multiple PythonParts.
Pros
- Can be unlinked to individual PythonParts.
- After unlinking, individual PythonParts behave like if they were placed individually.
- Correct representation in the IFC: group is an IfcAssembly.
- Simple hierarchy: group is the parent, PythonParts are the children.
Cons
- Each member must be a fully functional PythonPart - has a script and a PYP file
- Only flat hierarchy possible: PythonParts cannot have other Pythonparts as children.
- Reactivating the group leads to lost of manual changes done to individual PythonParts (e.g. loosing manually added attributes).
- Group cannot have any geometrical representation.
- Not possible to append attributes to the group, only to the individual PythonParts.
Learn more below
Structured PythonPart
You can introduce a hierarchy into a PythonPart container. This means, that each view of the PythonPart can have multiple children. The hierarchy can have unlimited number of levels: the children can also have children, which also can have children, and so on...
The entities inside the hierarchy are referred to as element nodes. Their representation in Python API is the ElementNodeElement class. Each element node:
-
has a UUID, which needs to be:
-
unique within the hierarchy (1)
- Creating two elements with the same UUID will result in these two elements be considered as one logical object in ALLPLAN - they will be selected together, have the same attributes, etc...
-
generated deterministically
-
-
has one parent element, which can be:
- the PythonPart itself (by default) OR
- another element node - must be set using the
SetParentID()method
-
can have it's own list of model element, common properties and attributes
The following diagram shows the relationships between entities inside a structured PythonPart:
erDiagram
PyP-PLACEMENT one or more to one PyP-DEFINITION: places
PyP-DEFINITION one to one or more PyP-VIEW  : has
PyP-VIEW one to one or more Sub-ELEMENT : has
Sub-ELEMENT one to one or more Sub-ELEMENT : has
Sub-ELEMENT one to zero or more MODEL-ELEMENT-3D : encapsulates
Sub-ELEMENT one to zero or more MODEL-ELEMENT-2D : encapsulates

PyP-PLACEMENT ["PythonPart placement"] {
    str Name
    Matrix3D PlacementMatrix
    Attributes Attributes
    CommonProperties CommonProperties
}

PyP-DEFINITION["PythonPart definition"] {
    str Name
    str Hash
}

Sub-ELEMENT["Element node"] {
    uuid uuid
    Attributes Attributes
    CommonProperties CommonProperties
}

PyP-VIEW["View"] {
    bool visibility2d
    bool visibility3d
    float start_scale
    float end_scale
}

MODEL-ELEMENT-3D["Model element 3D"] {
    Any Geometry
    CommonProperties CommonProperties
}

MODEL-ELEMENT-2D["Model element 2D"] {
    Any Geometry
    CommonProperties CommonProperties
}
Abstract
Key takeaways from the above diagram:
- The element nodes are assigned to the PythonPart view, which means that the hierarchy can be dynamic and vary depending on the current scale.
- An element node can have another node element as child. This allows you to create unlimited number of hierarchy levels.
Info
The UUID of each element node needs to be generated deterministically i.e. it must remain the same each time the PythonPart script is executed. This ensures the attributes manually assigned to the element node (i.e. by the user using native Allplan function) are preserved with each script execution. Even if the number of the element nodes and their position in the hierarchy is dynamic.
Flat hierarchy
Let's create a simple structured PythonPart with a flat hierarchy, where the PythonPart itself is the parent element and contains two child elements:
- First element,
box_1, is a simple cube as ModelElement3D - Second element, the
box_2, also a cube and also a ModelElement3D
flowchart TB

PyP["PythonPart"] --> El1["Box 1"]
PyP --> El2["Box 2"]-
Generate a UUID for both of them. You can use the UUID version 5 and the OID namespace, to generate the UUID based on a string, e.g.
'Box_1', like:import uuid ... box_1_uuid = uuid.uuid5(uuid.NAMESPACE_OID, f'Box_1') box_2_uuid = uuid.uuid5(uuid.NAMESPACE_OID, f'Box_2') #(1)!- If in your PythonPart the number of the element nodes is dynamic and the user removes or adds new elements, the same elements should become the same string (hence, the same UUID). In this way, their attributes gets preserved despite the changes in the hierarchy structure.
-
Create ElementNodeElements, one for each box:
-
Add elements to PythonPart view. Construct PythonPartUtil in a similar way to the one for a regular PythonPart but with one difference:
from PythonPartUtil import PythonPartUtil ... pyp_util = PythonPartUtil() pyp_util.add_pythonpart_view_2d3d(node_elements) #(1)!- Don't add the
box_1andbox_2to the PythonPart view. Instead, add the element nodes, as they already contain the boxes.
- Don't add the
-
Optionally append the attributes. If you want to append the attributes to the whole PythonPart, follow the procedure described above. However, you can assign attributes to each box individually. Prepare an attribute list for each and append to the PythonPart using the method
add_attribute_list_to_sub_element_in_structured_container(), like this: -
Create the PythonPart in the same way, as if it was a regular, unstructured PythonPart:
Nested hierarchy
It is possible to create a nested hierarchy, where an element node has other element node as child. Let's make the second box to be the child of the first box, like shown below.
flowchart TB

PyP["PythonPart"] --> El1["Box 1"]
El1 --> El2["Box 2"]
To achieve that, introduce an additional step between the steps 2 and 3. Declare the Box_1 to a parent
element of the Box_2 by pointing to its UUID. Use the SetParentID
method, like this:
Example on GitHub
The full implementation is shown in the example StructuredPythonPart ( PYP | PY). After you place the PythonPart in Allplan model, explore the parent-child relationships:
- Download this Report Template
- Run the Allplan function Reports and generate a report using the downloaded template
- In the report, you should see the children of the PythonPart and parent and children of each of the element node
Child elements
A PythonPart can be linked with other elements with a parent-child relationship (PythonPart being the parent). The elements are linked to the placement, which means that each placement can have different elements linked to it.
erDiagram
PyP-PLACEMENT |o..o{ FIXTURE : links
PyP-PLACEMENT }|--|| PyP-DEFINITION: places
PyP-DEFINITION ||--|{ PyP-VIEW  : has
PyP-VIEW ||--|{ MODEL-ELEMENT-3D : encapsulates
PyP-VIEW ||--|{ MODEL-ELEMENT-2D : encapsulates
PyP-PLACEMENT |o..o{ REINFORCEMENT : links
PyP-PLACEMENT |o..o{ LIBRARY-ELEMENT : links

PyP-PLACEMENT ["PythonPart placement"] {
    str Name
    Matrix3D PlacementMatrix
    Attributes Attributes
    CommonProperties CommonProperties
}

PyP-DEFINITION["PythonPart definition"] {
    str Name
    str Hash
}

PyP-VIEW["View"] {
    bool visibility2d
    bool visibility3d
    float start_scale
    float end_scale
}

MODEL-ELEMENT-3D["Model element 3D"] {
    Any Geometry
    CommonProperties CommonProperties
}

MODEL-ELEMENT-2D["Model element 2D"] {
    Any Geometry
    CommonProperties CommonProperties
}

FIXTURE["Fixture"]
REINFORCEMENT["Reinforcement"]
LIBRARY-ELEMENT["Library element"]
A typical use-case for this kind of relationship is a PythonPart with reinforcement. The reinforcement elements are not encapsulated in the PythonPart, but linked to it. This makes the generation of bending schedules and schemas possible.
The table below shows an overview of all the elements, that can be connected like this, and the function that is to be used.
| Child element | Function to use |
|---|---|
| Architecture component | add_architecture_elements() |
| Reinforcement | add_reinforcement_elements() |
| Library element | add_library_elements() |
| Fixtures | add_fixture_elements() |
Warning
Avoid including these elements directly into the PythonPart views. Although it is possible, it may lead to unexpected behavior of the PythonPart.
Bear in mind, that linked elements can be freely modified, moved or deleted by the user with Allplan native functions. But as soon as the PythonPart gets reactivated, these changes are lost.
Example on GitHub
The functionality mentioned above is shown in the example PythonPartWithSubObjects ( PYP | PY). To create a child element, check the corresponding checkbox and place the PythonPart in the model. Check the behavior, when moving the PythonPart and the sub object. Check the relationships in the Allplan Object manager.
PythonPart group

Multiple PythonPart placements can be grouped together into a PythonPart group. The user interaction with a group is the same as with a regular PythonPart, but the individual group members can be evaluated by Allplan reports. This allows you to create model elements that are seen by the user as one, but by Allplan as many elements. A typical use-case are set-like components, that must be invoiced individually (e.g. screw, nut and washer).
erDiagram
PyP-GROUP ||--|{ PyP-PLACEMENT: has
PyP-PLACEMENT }|--|| PyP-DEFINITION: places
PyP-DEFINITION ||--|{ PyP-VIEW  : has
PyP-VIEW ||--|{ MODEL-ELEMENT-3D : encapsulates
PyP-VIEW ||--|{ MODEL-ELEMENT-2D : encapsulates

PyP-GROUP["PythonPart group"] {
    str Name
}

PyP-PLACEMENT ["PythonPart placement"] {
    str Name
    Matrix3D PlacementMatrix
    Attributes Attributes
    CommonProperties CommonProperties
}

PyP-DEFINITION["PythonPart definition"] {
    str Name
    str Hash
}

PyP-VIEW["View"] {
    bool visibility2d
    bool visibility3d
    float start_scale
    float end_scale
}

MODEL-ELEMENT-3D["Model element 3D"] {
    Any Geometry
    CommonProperties CommonProperties
}

MODEL-ELEMENT-2D["Model element 2D"] {
    Any Geometry
    CommonProperties CommonProperties
}
Abstract
Key takeaways from the above diagram:
- Flat hierarchy: the individual PythonParts inside a group are all children of the PythonPart group
- The group itself does not have any geometrical representation.
Info
In the following code snippets we will implement the individual PythonParts and the group as a standard PythonPart. Implementation as an interactor or script object is possible as well.
To create a PythonPart group, prepare its members first. These must be fully functional,
regular PythonParts, i.e. they must have a PYP file and a script (python module). Just for the sake
of this article we will refer to them as sub-PYP and sub-script. To be able to put them in
a group, make sure that, beside all the required functions (like create_element), there is a
function/method that returns a PythonPart object in the sub-script.
We will need it in the script for the group. If you are using PythonPartUtil,
you can use the get_pythonpart method.
This is how the implementation can look like:
def create_pythonpart(build_ele: BuildingElement) -> PythonPart:
    python_part_util = PythonPartUtil()

    ...  #(1)!

    return python_part_util.get_pythonpart(build_ele)

def create_element(build_ele, _doc) -> CreateElementResult:

    python_part = create_pythonpart(build_ele)  #(2)!
    return CreateElementResult(python_part.create())
- Define the views, attributes and other stuff here.
- You can use the PythonPart object you created later in the create_element function for the creation of the individual PythonPart.
With this little tweak, the sub-script creates an individual PythonPart when the user starts
the sub-PYP, but now we can use the function create_pythonpart inside the script of the
PythonPart group, to get the PythonPart object and group it.
The PythonPart group has its own PYP file and script (python module). Let's refer to them as group-PYP and group script. The parameters inside the group-PYP are defined completely independently from the sub-PYP(1). Therefore, in the group script we need both BuildingElements: with parameters from sub-PYP and from the group-PYP. The latter is given by the PythonPart framework inside the create_element function. The latter we must get by reading the sub-PYP file.
- Depending on the use-case, a group parameter may have an influence on the parameters of the individual members. For example, in a screw-nut-washer set all the individual components will have the parameter diameter. When placing them as individual PythonParts, you could set a different diameter for each component. But in a group, there will only by one diameter, which will then influence all three diameters of the sub components: the dimeter of the screw, nut and washer.
We also need to call the create_pythonpart function from the sub-script to get the
PythonPart objects and group them. Therefore, we need to import
the sub-script as a python module
Both tasks can be done by calling the read_build_ele_from_pyp function:
def create_element(build_ele, _doc) -> CreateElementResult:

    result, sub_script, sub_build_ele = BuildingElementService.read_build_ele_from_pyp(path_to_sub_pyp)

    sub_build_ele.Diameter.value = build_ele.Diameter.value #(1)!
- The
sub_build_elewill contain parameters of the individual PythonParts with their default values (as defined in the sub-PYP). You can alter these values, e.g. based on the parameter values from the group-PYP, like this.
Now, having the sub_build_ele with the right parameter values, we can construct the individual
PythonPart objects, by calling the function create_pythonpart from the sub_script module:
Lastly, construct a PythonPartGroup using the from_build_ele method. Use the BuildingElement representing the group-PYP (the one you were given by the framework) to do it. Then append the individual PythonParts to it. Then, use the create method to get a model element list that can be put into the CreateElementResult data class and you are done.
pythonpart_group = PythonPartGroup.from_build_ele(build_ele)
pythonpart_group.append(pythonpart)

return CreateElementResult(pythonpart_group.create())
Tip
A PythonPart group created like this is modifiable with a double-click as one component, although it consist of multiple. However, the user can use ALLPLAN functionality called unlink smart symbol to remove the group but leave the components. After that, the components are modifiable as if they were placed individually.
Example on GitHub
The entire implementation is shown in the example PythonPartGroup ( PYP | PY), that uses the PythonPartWithAttributes ( PYP | PY) as a subordinate PythonPart.
Display name
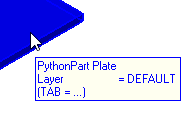
A PythonPart element can represent any component: from a screw to an abutment. To enable the user to easily distinguish between different types of PythonParts inside the viewport you can assign a customized display name to your PythonPart.
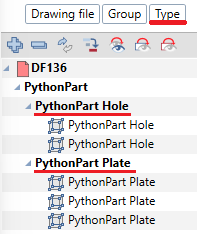
This customized name will be then displayed to the user, when he hovers the mouse over the PythonPart inside a viewport (as shown on the image above) which improves the UX during the element selection. Furthermore, the user will be able to group the PythonParts by this name inside the object manager, when he chooses the Type criterion (as shown on the image to the left).
To achieve this, provide the display name, when calling the create_pythonpart method:
elements = pyp_util.create_pythonpart(
    build_ele,
    type_uuid = "c0398407-1d54-4087-a8da-7d6aaffb25ec", #(1)!
    type_display_name = "PythonPart Plate"
    )
- Beside the display name, you can provide a UUID for the element type, your PythonPart
represents. It will override the
PythonPart_TypeUUIDin the created element. This will allow you to set-up a filter for selecting only your type of PythonPart, which can be very useful when building a script for modification.
Info
The same functionality is available also for PythonPart groups inside the constructor of the PythonPartGroup class.
Creation vs. modification mode
A PythonPart can be run in creation mode (when e.g. started from ALLPLAN Library) or in a modification mode (when reactivated per double-click on an existing PythonPart element). Sometimes, you want your PythonPart to behave differently in both situations
To check, whether a standard PythonPart was started in modification mode, use the DocumentManager. It is a singleton, that stores the information about the modified PythonPart element. If there is no PythonPart element, the script is run in creation mode:
The information, whether a script object is run
in modification or creation mode, is passed by the framework to the script object class constructor
in the BaseScriptObjectData class. Extend the
constructor method from the base class BaseScriptObject
and you will have access to the property is_modification_mode:
class YourScriptObject(BaseScriptObject):

    def __init__(self,
                 build_ele         : BuildingElement,
                 script_object_data: BaseScriptObjectData):

        super().__init__(script_object_data) #(1)!

        if self.is_modification_mode:
            ### introduce actions for modification mode here
        else:
            ### introduce actions for creation mode here
- Extend the constructor of the base class!
In an interactor, the information whether the script is run in modification or creation mode, can be get out of the list with UUIDs of the modified elements. When it's empty, the script is run in creation mode:
class YourInteractor(BaseInteractor):

    def __init__(self,
                 coord_input             : AllplanIFWInput.CoordinateInput,
                 pyp_path                : str,
                 global_str_table_service: StringTableService,
                 build_ele_list          : list[BuildingElement],
                 build_ele_composite     : BuildingElementComposite,
                 control_props_list      : list[BuildingElementControlProperties],
                 modify_uuid_list        : ModificationElementList): #(1)!

        self.modification_element_list = modify_uuid_list
        ...
        if self.modification_element_list.is_modification_element():
            ### introduce actions for modification mode here
        else:
            ### introduce actions for creation mode here
- The ModificationElementList is a list with UUIDs of modified elements. In creation mode, it's empty. Use the dedicated method is_modification_element to check, whether it is the case.
Tip
If want to hide/disable some controls in the property palette for the modification mode, implement it directly in the PYP file e.g., like this:
Learn more in this article.
Update of identical PythonParts
After a PythonPart has been changed, ALLPLAN searches through the DF for other PythonParts with the same hash. If some are found, a dialog box, as shown on the right, appears. After the user hits yes, ALLPLAN recreates these PythonParts, applying the same values to their parameters, as the ones specified for the originally modified PythonPart, ensuring all the identical PythonParts remains identical after the modification.
In some cases, we want two PythonParts to be considered identical, despite some parameter values
being different. E.g. a parameter responsible for rotation is not relevant, because two PythonParts
rotated differently, are still the same. In this case, it makes sense to exclude these rotation
parameters from the identical check. To achieve this, add the <ExcludeIdentical> tag to the <Parameter>.
Example on GitHub
Have a look on the example IdenticalRotatedPlate ( PYP | PY).
In this example, a plate can be rotated around all three axes. The rotation angle is entered
in the palette as a parameter. If all parameters would be used for an identical check, plates
with identical geometry, but not identical rotation angles will not be considered identical.
Setting the <ExcludeIdentical> tag to True in the rotation parameter solves
this issue.
Modify existing PythonParts
You can build a script that is modifying existing PythonParts. This might be useful, if you want to cover a complex modification workflow or allow bulk modification of many PythonParts and you want to provide the user with a tool just for that.
Info
The modification of a PythonPart is different from modifying any other element, because it is usually followed by the recalculation (running the Python script through). If your modification does not require it, you can follow the instructions for a general element modification in this article
The modification of an existing PythonPart requires you to implement the selection,
which is possible only with a script object or
an interactor. In the following description,
the selected_pyp ist the BaseElementAdapter
pointing to the PythonPart
Tip
With the [PythonPartByNameFilter][Utils.ElementFilter.PythonPartByNameFilter.PythonPartByNameFilter] you can construct a filter object, that filters only the PythonParts of the same type (created by the same script) as the selected PythonPart
The simplest modification of a PythonPart consists of two steps:
-
Prepare new parameter values. Build a list with [ModifiedParameterData][Utils.PythonPart.ModifyPythonPartParameterUtil.ModifiedParameterData]. Each entry in this list represents a parameter modification.
new_param_data = [ModifiedParameterData("Length", new_length), #(1)! ModifiedParameterData("Width", new_width), #(2)! ]-
If the new value depends on the old one, you can read the old values like:
-
Order matters! Each list entry calls the
modify_element_propertymethod in exactly the same order, as given in the list.
-
-
Recalculate the PythonPart. Use the static method [
ModifyPythonPartParameterUtil.execute()][Utils.PythonPart.ModifyPythonPartParameterUtil.ModifyPythonPartParameterUtil] to do that.-
If you just want to update the PythonPart, without changing any parameter, just pass an empty list:
The method call basically simulates1 following actions:
- double-click on a PythonPart to modify it
- changing the properties in the palette as specified
new_param_data - hitting Esc to close it
-
Tip
Just like during manual modification, if there are several identical PythonParts in the model, the user will get the pop-up about updating identical PythonParts. You can suppress this temporarily:
pyp_settings = AllplanSettings.PythonPartsSettings.GetInstance()
pyp_settings.UpdateIdenticalPythonParts = AllplanSettings.UpdateIdenticalPythonPartsState.eDoNotUpdateIdentical

ModifyPythonPartParameterUtil.execute(selected_pyp, self.coord_input, new_param_data)

pyp_settings.UpdateIdenticalPythonParts = AllplanSettings.UpdateIdenticalPythonPartsState.eDoUpdateIdentical
Tip
If, after selecting a PythonPart, you want to show its palette to the user, let him/her do
the input and recalculate PythonPart after that, you can introduce this workflow step with the
[ModifyPythonPartUtil][Utils.PythonPart.ModifyPythonPartUtil.ModifyPythonPartUtil].
Assign it to the script_object_interactor property of your interactor:
def start_next_input(self):
    self.palette_service.close_palette()  #(1)!
    self.script_object_interactor = ModifyPythonPartUtil(self.sel_result.sel_element)
    self.script_object_interactor.start_input(self.coord_input)
- It will open the palette of the modified PythonPart, so make sure to close the palette of your modification PythonPart.
Example on GitHub
To see the full implementation, have a look on the following examples:
PythonPart transaction
In some situations it's required to undertake some actions after the elements are created. A good example is the rearrangement of the reinforcement mark numbers. We can do this only after the reinforcement is created, because only then ALLPLAN is able to recognize identical shapes.
The class PythonPartTransaction takes care of exactly that. It creates model elements and subsequently introduces additional steps, so that you as a developer doesn't have to implement them. These steps can involve:
- taking care of correct creation of PrecastElements
- recreating reinforcement labels added with native ALLPLAN function
- connecting existing elements and the PythonPart
- rearrangement of the reinforcement mark numbering
- creation of the undo step
Note
When you create your script as a Standard PythonPart, the transaction is executed by the framework for you. In an Interactor PythonPart you have to implement it yourself.
Example
Before executing the transaction, the object has to be constructed first:
After constructing the transaction, we can call the execute method. We call it at the point,
where we would create the elements from the model_ele_list in the drawing file:
pyp_transaction.execute(placement_matrix       = AllplanGeo.Matrix3D(),
                        view_world_projection  = self.coord_input.GetViewWorldProjection(),
                        model_ele_list         = model_element_list, #(1)!
                        modification_ele_list  = self.modification_ele_list, #(2)!
                        rearrange_reinf_pos_nr = ReinforcementRearrange(), #(5)!
                        append_reinf_pos_nr    = True,
                        uuid_parameter_name    = "",  #(3)!
                        use_system_angle       = True) #(4)!
- Here we pass the list of model elements that we want to create. For elements, that requires additional actions after the creation (like e.g. a PrecastElement), these actions will be introduced by the framework, as they are already implemented in the execute method.
- In a modification mode, this list should contain UUIDs of the modified elements, so that these elements preserves their other unique identifications after the modification (e.g. IfcID). In a PythonPart script constructed as an Interactor you get this list the create_interactor function.
- If you want to save the UUID of the PythonPart, you create, in one of its parameters, you can provide the name of this parameter here. This might be important, if you create a PythonPart that should react accordingly, when being modified after being copied by the user. Because after being copied, the PythonPart becomes a new UUID, but its parameters remain. This is how you can make the copied PythonPart remember the UUID of the PythonPart it originated from.
- When set to True, the elements are rotated accordingly to consider the crosshair rotation during the creation.
- See the documentation of ReinforcementRearrange class to learn about possible settings.
After calling the execute method, elements from
the model_ele_list are created in the model. Subsequently, a series of actions are performed.
See the documentation of the method for more details.
Example on GitHub
For a complete usage of PythonPartTransaction, see the example ModelPolygonExtrudeInteractor ( PYP | PY)
-
During the update, few features are turned off for better performance e.g., handles are not shown. ↩