Coordinate input
Abstract
-
Coordinate input means specifying a point in a three-dimensional space by pointing it on a two-dimensional screen.
-
This requires augmenting the 3rd dimension with point snapping and track tracing (see definitions below ).
-
ALLPLAN offers 3 types of coordinate input:
- picking a single point
- drawing a polyline
- drawing a polygon
-
Implementation of coordinate input differ significantly, depending on whether you are building an interactor or a script object PythonPart. Select the right tab, when exploring this article.
-
Introducing coordinate input in a standard PythonPart is not possible.
Definitions
Point snapping - means searching for some characteristic points of geometrical objects, such as start, end or middle point and aligning the position of the cross hair precisely with this point. Which points are snapped during the coordinate input, depends on settings set in ALLPLAN by the user. You, as a developer, can influence this only to some extend.
Track tracing - means specifying a point on a virtual construction line drawn in a specific way from a track point. This line can be drawn, e.g. in orthogonal direction or as an extension of an existing object (e.g. line or edge).
Implementation
Point input
Point input is implemented in the module PointInteractor, which is included in PythonParts framework. You just need to use it in your script object class in a correct way.
Follow these implementation steps:
-
Define instance attribute for saving the results. They should be saved in a dedicated data class
PointInteractorResult. Do it in the constructor, like: -
Optionally you can define a callable for drawing a preview. Only, if you need to draw some special preview symbols or elements in the viewport during the input. It will be called with every mouse movement. The callable should take no arguments and no return value. Here is an example implementation:
def draw_preview(self): preview_symbols = PreviewSymbols() preview_symbols.add_text(...) placement_matrix = AllplanGeometry.Matrix3D() placement_matrix.SetTranslation( AllplanGeometry.Vector3D( self.point_input_result.input_point #(1)! ) ) preview_symbols.draw( placement_matrix, self.coord_input.GetViewWorldProjection() )- When the preview depends on the point, use the one from the result object. It's updated with every mouse movement, so will be your preview.
-
Initialize the input by creating an instance of
PointInteractorand assigning it to thescript_object_interactorproperty of your script object class. Depending on when do you want to start the input, initialize the input in an appropriate method (learn more here). In this example, the input should start right after the PythonPart is started, so the right place is thestart_input()method.def start_input(self): self.script_object_interactor = PointInteractor( interactor_result = self.point_input_result, is_first_input = True, request_text = "Place the element", #(1)! preview_function = self.draw_preview #(2)! )- This is the user prompt, that will be shown in the dialog line, when the input is started. Provide a meaningful message to your users for a good UX.
- If you implemented a optional callable for preview draw, as described in point 2,
pass it here. Pass the callable without calling it! No
()after it!
From now on, the
PointInteractorclass is handling the interaction itself. Point snapping and track tracing (see definitions above ) are triggered under the hood. You only need to handle what should happen after the successful point input.Tip
If you want to alter the default behavior during the coordinate input, define your own interactor and result class and use it instead of the PointInteractor.
-
Terminate the input by removing the reference to the
PointInteractorfrom thescript_object_interactorproperty. This needs to be done in thestart_next_input()def start_next_input(self): if self.pnt_result != PointInteractorResult(): #(1)! self.script_object_interactor = None- Before terminating, it makes sense to check, whether the input was done correctly and the result class is not empty
To access the input point, read the property input_point of the result data class:
In an interactor, the implementation is more complex because you need to handle also the interaction itself (each mouse movement, mouse click, etc...).
Tip
You can implement an interactor class, as described in the following steps, and use it inside your script object class.
Follow these implementation steps for basic case:
-
Initialize the input. Do it at the beginning of the script flow, in the constructor.
Call
InitFirstPointInput(), like:def __init__(...): ... prompt_msg = AllplanIFW.InputStringConvert("Input first point") #(2)! self.coord_input.InitFirstPointInput(prompt_msg, input_mode) #(1)!input_modeis optional and defines the identification mode. Learn more below .- Provide a meaningful prompt to the user for a better UX. It will be shown in the dialog line, where such instructions are expected to appear.
This will show standard coordinate input tools in the dialog line:

Call
InitFirstPointValueInput():def __init__(...): ... prompt_msg = AllplanIFW.InputStringConvert("Input first point") input_control_type = AllplanIFW.eValueInputControlType.eANGLE_COMBOBOX #(1)! input_control = AllplanIFW.ValueInputControlData( input_control_type, bSetFocus = False, #(2)! bDisableCoord = False #(3)! ) self.coord_input.InitFirstPointValueInput( prompt_msg, input_control, identMode = input_mode #(4)! )- To see, what input controls are possible and what is their behavior, refer to the documentation of eValueInputControlType and have a look on the example PointInput
- True will set the focus on the input control, False will set the focus on the X coordinate
- When set to True, all three coordinate input controls will be disabled during the input in the additional input control
- At this stage, you can optionally choose the identification mode. Learn more below .
This will show coordinate input tools (X,Y,Z) and an additional input field in the dialog line. This field can be used e.g. to input a rotation angle, text or any additional number. To read the entered value, call
GetInputControlValue()at any time of the script flow.
Info
Pressing Enter inside the additional input field triggers the on_value_input_control_enter event. Implement it in your interactor to react to this event.
Now, you can call other methods of
CoordinateInputto influence how the input is done. For example:- This allows the user to click in the wizard window.
- This will show only the input fields for X any Y coordinates in the dialog line.
Warning
Some of the methods may not have any influence during the coordinate input, but only during the selection or vice versa. To try out only the relevant ones, run the example PointInput.
Tip
Any change done by the user in the input controls triggers the on_preview_draw event.
-
Perform point identification. Do it by calling
GetInputPoint()with every mouse movement, i.e. in theprocess_mouse_msg()event. This is critical, because each call triggers the snapping and track tracing (see definitions above ). Regarding the latter, you can specify from which point the track should be traced:
To not track any point except of those, that user picks himself (as shown on the gif), call:
def process_mouse_msg(self, mouse_msg, pnt, msg_info): ... input_result = self.coord_input.GetInputPoint( mouse_msg, pnt, msg_info #(1)! )pntis the mouse position in viewport coordinates. A viewport is flat, so it is a Point2D. The origin of the viewport coordinate system is in the middle of the viewport.

To use previous input point as track point, call:
def process_mouse_msg(self, mouse_msg, pnt, msg_info): ... input_result = self.coord_input.GetInputPoint( mouse_msg, pnt, msg_info, True #(1)! )pntis the mouse position in viewport coordinates. A viewport is flat, so it is a Point2D. The origin of the viewport coordinate system is in the middle of the viewport.
To use a specific point as track point, call:
def process_mouse_msg(self, mouse_msg, pnt, msg_info): ... input_result = self.coord_input.GetInputPoint( mouse_msg, pnt, msg_info, AllplanGeo.Point3D(...), True #(1)! )pntis the mouse position in viewport coordinates. A viewport is flat, so it is a Point2D. The origin of the viewport coordinate system is in the middle of the viewport.
Info
The point identification should also be performed during the input in one of the XYZ coordinate input fields in the dialog line. This must be implemented in the
on_preview_draw()event. Because in this event there is no mouse message, callGetCurrentPoint(), as this method does not require it: -
Get the point in world coordinate system. It makes sense to do it only, when needed. For example, after the mouse was clicked. Call
GetPoint()on the result objectinput_result, obtained in the previous step:def process_mouse_msg(self, ...) ... if not self.coord_input.IsMouseMove(mouse_msg): point = input_result.GetPoint()Now, the
pointvariable contains aPoint3Din world coordinate system. Perform the actions you need with it. -
If in the point 1 you have defined the
input_modeand you have chosen an identification mode that performs point and element identification, you can now get the identified element by calling the GetSelectedGeometryElement.What it would be, depends on the options you set in the SnoopElementGeometryFilter. By default, the entire geometry of the element is returned.
-
Reinitialize the input. Do it by calling
InitFirstPointValueInput()like in the first step. Alternatively, if you want the user to input another point in the same document, callInitNextPointInput().Warning
It is important to always reinitialize the input after it's completed! Not doing so, may lead to an unexpected behavior or even a crash.
Example on GitHub
The entire implementation of a point input with all relevant options is shown in the example PointInput ( PYP | PY)
Identification mode
Optionally, the input can be initialized with an extra argument: input_mode
prompt_msg = AllplanIFW.InputStringConvert("Input first point")

input_mode = AllplanIFW.CoordinateInputMode(
    AllplanIFW.eIdentificationMode.eIDENT_POINT,
    AllplanIFW.eDrawElementIdentPointSymbols.eDRAW_IDENT_ELEMENT_POINT_SYMBOL_YES  #(1)!
)

self.coord_input.InitFirstPointInput(prompt_msg, input_mode)
- This option is relevant only during point and element identification (i.e. when
identification mode is set to something beginning with
eIDENT_POINT_ELEMENT...)
This object of type CoordinateInputMode determines the way, how the point identification will be performed. All the options are specified in eIdentificationMode. In practice, you need to distinguish only two options:

By default, the coordinate input starts with a point identification mode
(eIDENT_POINT).
It's the standard way, where point snapping and tracing are performed. Other options,
whose name contain POINT but do not contain ELEMENT, will have a similar effect.
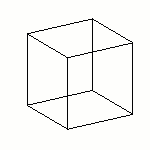
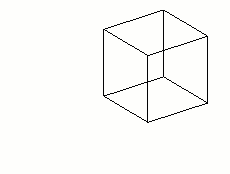
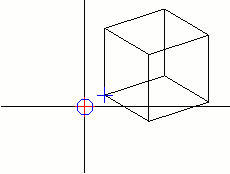
When you choose of the options with the word ELEMENT in the name, ALLPLAN will additionally search for geometry elements during the point identification. The identified elements are then highlighted in the viewport (see the edges of the cube on the right) and you can access them in the script (see step 4 above). You can define how these elements are detected in the SnoopElementGeometryFilter object:
geometry_snoop = AllplanIFW.SnoopElementGeometryFilter(...)#(1)!
self.coord_input.SetGeometryFilter(geometry_snoop)
- As there are many options, you can set here, we recommend you to first try them out by running the example PointInput
Tip
Using this kind of identification might be useful to optimize the workflow. E.g., while prompting the user to input 2 points to calculate a vector, you might allow the user to simply select an existing line and calculate the vector based on it. This requires one click instead of two, at the same lets the user to specify 2 points, if he wants to.
Polyline input
ALLPLAN polyline input functionality offers the user the same toolbar, as during the point input and additionally a second one (shown below) with tools specific for the polyline input, like polygonization of curves or undo button.

-
Initialize the input by constructing the
PolylineInput. Do it at the beginning of the script flow, i.e. in the constructor of your interactor class. -
Execute the input by calling ExecuteInput() in the
process_mouse_msg()event:def process_mouse_msg(self, mouse_msg, pnt, msg_info): ... self.polyline_input.ExecuteInput(mouse_msg, pnt, msg_info)This call:
- triggers point snapping and track tracing (see definitions above )
- gets the identified point, when mouse is clicked and adds it to the polyline.
-
Draw the preview. To get the polyline for preview purposes, call
GetPreviewPolyline(). This returnsPolyline3Dthat includes the segment from the last clicked point to the point currently pointed by the mouse (but not clicked yet). Implement it in all events, where the preview should be updated. Typicallyprocess_mouse_msg()andon_preview_draw(). -
Create elements. Get the polyline consisting of points, that were actually clicked, by calling
GetPolyline().In ALLPLAN, polyline input is usually confirmed by hitting Esc. For consistent UX, we recommend to implement the creation in the
on_cancel_function(), like:def on_cancel_function(self): ... polyline = self.polyline_input.GetPolyline() if polyline.Count() > 1: #(1)! self.create(polyline) #(2)! self.polyline_input.StartNewInput() return False ... return True- When the user hits escape after he already specified at least two points of the polyline,
the polyline is created and the input is restarted. The
return Falsewill keep the PythonPart running create()method should perform a transaction (element creation) and
The above implementation creates the element, when the polyline has at least one segment. After successful creation, the input is restarted - user can input new polyline. If the polyline does not have two points yet and the Esc was hit, PythonParts is terminated. Your workflow might be different.
- When the user hits escape after he already specified at least two points of the polyline,
the polyline is created and the input is restarted. The
-
Terminate the input by removing the reference to the PolylineInput object. The python garbage collector will remove the object from the memory, which will lead to the input termination
Currently, there is no interactor class for polyline input, that you could use
in your script object. What you can do as a workaround, is take the
PolygonInteractor class and adapt it slightly
to create a polyline instead of polygon input. Then you can use it as described
below .
Polygon input
ALLPLAN polygon input functionality offers the user the same toolbars, as during the polyline input with additional (but optional) buttons to create more than one polygon component, also a negative one (opening).

The result of the polygon input will always be a closed polygon. When the user inputs only two points, the result will be a rectangle. Use this functionality in use-cases, where it must be guaranteed that the input shape is closed and planar (e.g. room shape input).
Polygon input is implemented in the module PolygonInteractor,
which is included in PythonParts framework. The implementation steps are similar to point input:
-
Define instance attribute for saving the results. Use dedicated data class
PolygonInteractorResult. Do it in the constructor, like: -
Optionally you can define a callable for creating preview elements. When you don't define it, during the input only the outline will be previewed. If you are using this outline as basis of a more complex geometry, you may want to preview this geometry and not just the outline. If that's the case, implement a callable, that takes a
Polygon3Das an argument and returns a list of model elements. Here is an example: -
Initialize the input. Similar to point input, but create an instance of
PolygonInteractor:def start_input(self): self.script_object_interactor = PolygonInteractor( self.polygon_input_result, z_coord_input = True, multi_polygon_input = False, preview_function = self.create_preview_elements #(1)! )- If you implemented a optional callable for creating preview elements, as described
in point 2, pass it here. Pass the callable without calling it! No
()after it!
- If you implemented a optional callable for creating preview elements, as described
in point 2, pass it here. Pass the callable without calling it! No
-
Terminate the input by removing the reference to the
PolygonInteractorfrom thescript_object_interactorproperty.
To access the input polygon, read the property input_polygon of the result data class:
The implementation in an interactor is exactly the same, as for polyline input,
except you construct the PolygonInput object.